There are a few considerations after installing a wood countertop for your kitchen table. You have to seal it to protect it from stains, clean and polish it regularly, so it looks shiny, don’t pile it up with all your orders from big basket and replace the dull-looking boards with new ones.
Applying a finish like polyurethane on your tabletop, for instance, is one way to achieve maximum protection and an irresistible shine. Nevertheless, there are many important considerations when using this finish.
For example, how many coats of polyurethane should you apply? How can you prepare the wood surface (pre-application) to achieve the best result?
How Many Coats of Polyurethane on Kitchen Table?
Assuming you are using hardwood for the tabletop, you will need to apply at least three coats of polyurethane. Two coats may suffice for softer woods, but a third one guarantees the best result.
Still, there is a limit to how much poly you can apply to your kitchen table, so it’s best not to go overboard. Too much polyurethane will make the surface too thick and less appealing to the eye.
Applying Polyurethane on Kitchen Table: How to Prep the Wood Surface
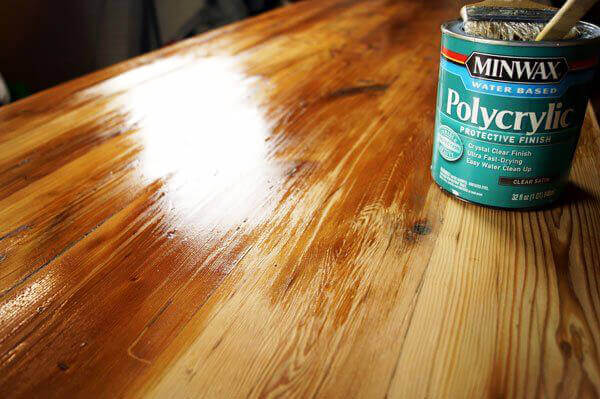
Polyurethane is a wood finish used in a lot of applications. Besides kitchen tables, you can also apply it to kitchen cabinets and office furniture. Poly is also applied as a top coat on hardwood floors.
Before you start applying polyurethane on the kitchen table, you need to prepare the wood surface.
Step 1: Clean the table
First, you need to clean the surface. You can use a vacuum cleaner or a brush to remove dust and other particles from the kitchen table. Always ensure the table-top is dirt- and particle-free before moving to step 2.
Step 2: Sand the tabletop
Also, you need to sand the surface of the kitchen table before finishing. Use sandpaper to smooth the entire tabletop, it will add an element to your home decor. Sanding removes the thin layer of dust and dirt on the surface.
First, use the coarse-grit sandpaper to remove the deep scratches. Then, use the finer-grit papers until your kitchen table is smooth. If your kitchen table has lots of dings, use wood fillers to cover them.
Step 3: Wipe with a damp cloth.
Next, you need to wipe the tabletop with a damp cloth again. This step helps you remove the dust and dirt that the sanding process leaves behind.
What are the Pros of Polyurethane as a Finish
Beyond surface protection, this finish offers myriad other benefits. Here are four pros of applying polyurethane to your kitchen table:
Durability
Polyurethane is durable, abrasion-resistant, flexible, and long-lasting. It’s perfect for high-traffic areas. In addition to being resistant, it’s also easy to clean and care for.
It is Non-toxic
Polyurethane is formaldehyde-free, non-toxic, and odorless. It’s completely recyclable and is compliant with current environmental standards, including REACH.
Stain, heat, & scratch resistant
Polyurethane is resistant to stains, scratches, heat, and cold. It’s perfect for high-traffic areas, including kitchens, bedrooms, and living rooms.
Cost-effective
Polyurethane is an affordable way to revamp your tabletop. It offers the best value for your money.
Beauty
Polyurethane adds an appealing shine to your kitchen table. And if you like, you can stain or paint your table before finishing.
Tips to Achieve an Appealing Polyurethane Coat
Most people don’t know that some polyurethane variants are water-based. That makes it extremely easy to use. But you have to understand how to apply it, or it will look bad. Here are some tips on how to do it right:
Sand the surface based on your needs
You don’t want to work on a surface that’s rough and uneven. This is where sanding helps. But if you’re going for a rugged look and want to keep the wood’s natural appeal, do not sand too much before applying the coating.
Finish in a low-dust area
When finishing the table, put it in a spot with low dust. This will keep dirt and other debris off the surface while it dries, ensuring a smooth finish.
Stain or paint before finishing to add some flair
If your kitchen table looks like it could use some flair, consider staining or painting it before applying the polyurethane.
Water-based versus oil-based polyurethane
If you choose an oil-based polyurethane, you need to add 10% mineral spirits to thin it out. In contrast, water-based paints do not require thinning.
Apply wax after it has cured
After the polyurethane has cured, you can shine and protect the piece by buffing it with wax. However, be sure to rub off the excess wax with a clean, dry cloth.
Take your time
Be patient when applying polyurethane to a table. Note that it will take days to work it from scratch to finish. If you skip steps, you could end up with rough, uneven layers that haven’t healed properly.
Take your time applying the coats, remembering that each layer must cure properly before the next layer is added.
Final words on the Number of Polyurethane Coats to Apply
Working your tabletop is one of the easiest ways to achieve a kitchen makeover. A little sanding and some layers of polyurethane can make a big difference to the appearance of your kitchen table.
But how many layers should you apply? If you just get two coats, your table might look great at first, but it will look pretty bad sooner than later. Always consider three layers to ensure maximum protection.
- Renovate or Rebuild? What to Consider If Your Melbourne Home Needs Major Structural WorkIf your Melbourne home requires extensive structural work, you may be wondering whether it’s better to restore what’s already there or begin again with a brand-new home. Navigating the renovate vs rebuild Melbourne decision can seem complex at first, but taking the time to understand... The post Renovate or Rebuild? What to Consider If Your […]