Glass kitchen splashbacks have emerged as a modern and stylish choice for homeowners looking to add functionality and aesthetic appeal to their kitchens. Their sleek appearance, reflective surfaces, and versatility make them popular in contemporary kitchen designs. In this extensive blog post, we’ll delve into the various aspects that make glass splashbacks a radiant choice, exploring their benefits, design versatility, installation process, maintenance tips, and more.
Section 1: Understanding the Appeal of Kitchen Splashbacks
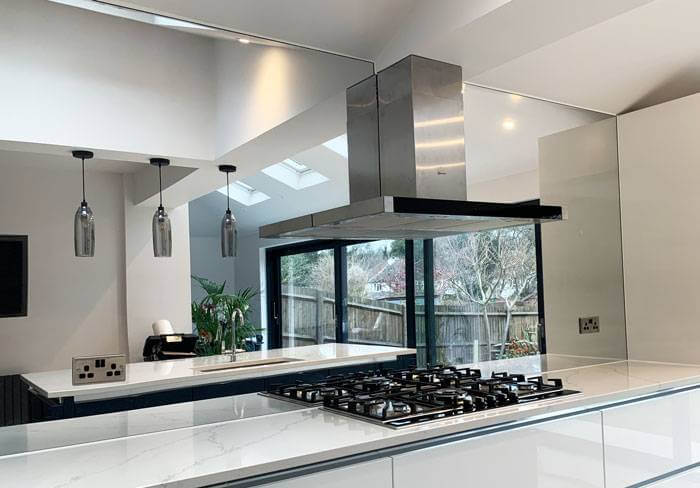
- The allure of glass: Discussing the inherent qualities of glass that make it an attractive material for kitchen installations.
- Reflective properties: Highlight how glass splashbacks amplify light and create an illusion of space within the kitchen area.
- Colour and design options: Exploring the wide range of colours, patterns, and finishes available in glass splashbacks, allowing customisation to suit different kitchen styles.
Section 2: Practical Benefits of Glass Splashbacks
- Hygienic advantages: Discuss the non-porous nature of glass and its ease of cleaning, making it a clean choice for kitchen spaces.
- Heat resistance: Explaining how glass splashbacks are heat-resistant and suitable for installation behind cooktops, providing protection and easy maintenance.
- Durability and longevity: Highlighting the durability of toughened glass used in splashbacks, ensuring they withstand daily wear and tear.
Section 3: Design Versatility and Integration
- Seamless integration: Discuss how glass splashbacks seamlessly integrate with various kitchen designs, from modern to traditional.
- Visual impact: Exploring how these splashbacks can be a focal point in the kitchen, enhancing the overall aesthetic appeal.
- Customisation options: Highlighting the possibilities of customisation, such as printed designs or digitally printed images on glass, allowing for unique personalisation.
Section 4: Installation Process and Considerations
- Installation overview: Explaining the installation process of glass splashbacks, including measurements, preparation, and fitting.
- Professional vs. DIY installation: Discuss the importance of professional installation for ensuring safety and precision.
- Considerations before installation: Outlining factors, such as wall condition, measurements, and choice of glass thickness.
Section 5: Maintenance and Care Tips
- Cleaning methods: Providing tips and best practices for cleaning and maintaining glass splashbacks to retain their radiance.
- Avoiding damage: Guidance to prevent scratches, chips, or cracks and carefully handle glass splashbacks.
- Recommended cleaning products: Suggest suitable cleaning products that are safe for maintaining the integrity of glass surfaces.
Conclusion:
Glass kitchen splashbacks undoubtedly add an element of radiance and sophistication to any kitchen space. Their blend of functionality, design versatility, and easy maintenance makes them an appealing choice for homeowners aiming to elevate their kitchen aesthetics. By understanding their benefits, installation process, and maintenance requirements, one can fully appreciate and enjoy the radiant beauty that glass splashbacks bring to modern kitchens.
Fitting a glass splashback requires precision and attention to detail to ensure a seamless installation. Here’s a concise guide to providing a glass splashback in your kitchen:
- Prepare the Surface: Ensure the wall surface where the splashback will be installed is clean, dry, and free from debris or grease. Smooth out any irregularities or bumps that could affect the fitting of the glass splashback.
- Measurements and Cutting: Accurate measurements are crucial—measure where the splashback will go and transfer these measurements to the glass. Use safety equipment such as gloves and goggles, then cut the glass according to the measured dimensions. Consider hiring a professional glass cutter if you need more clarification about cutting the glass yourself.
- Adhesive Application: Apply an appropriate adhesive recommended for glass splashbacks onto the back of the glass. Follow the manufacturer’s instructions regarding the application method and coverage. Apply the adhesive evenly to ensure a secure bond.
- Best Legacy Application Modernization Companies for Enterprise SystemsEnterprise legacy applications don’t fail dramatically. They degrade slowly. Features take three times as long to ship as they used to. Integrations with new tools require workarounds nobody’s proud of. The developers who understand the system deeply are either burned out or leaving. A... The post Best Legacy Application Modernization Companies for Enterprise Systems […]