
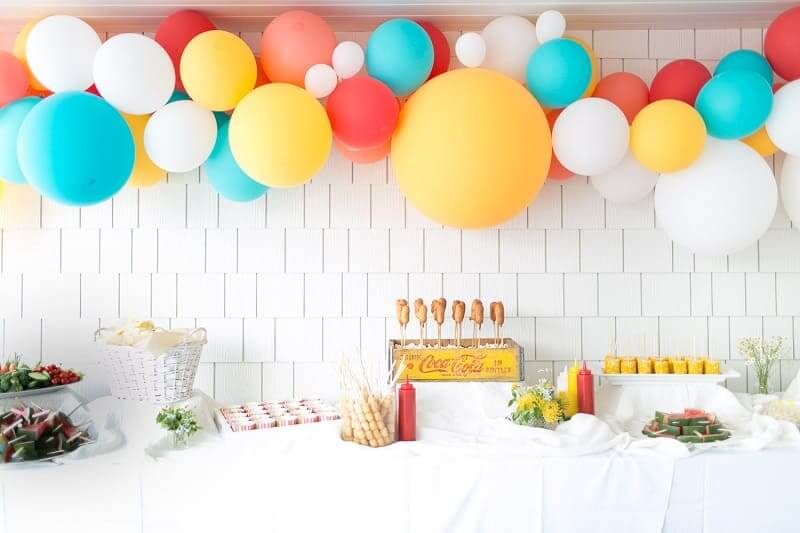
Balloon garlands are a fun and festive way to decorate for any occasion. Whether it’s a birthday party, baby shower, or wedding, a colorful balloon garland is sure to add some pizzazz to your decor. Making a balloon garland may seem like a daunting task, and you may want to buy a ready-made version https://balloons.online/balloon-garland-arch-kits/. However, if you feel like being creative, you can easily create a beautiful garland at home with the right tools and a few simple steps.
Materials Needed
Before you start making your balloon garland, you’ll need to gather some materials. Here’s a list of what you’ll need:
- Balloons in various colors and sizes
- Balloon pump
- Balloon tape or string
- Scissors
- Command hooks (if hanging the garland)
Step-by-step instructions for creating an arch with your own hands
Step 1: Inflate the Balloons
The first step in making a balloon garland is to inflate your balloons. You’ll want to inflate them to different sizes to add dimension to your garland. To make the process faster and easier, we recommend using a balloon pump.
Step 2: Create the Base of the Garland
Next, you’ll want to create the base of your garland. You can use balloon tape or string for this step. If you’re using balloon tape, simply attach the tape to a flat surface, like a table or the floor, and then start attaching your balloons to the tape. If you’re using string, tie a knot at one end and then start threading your balloons onto the string.
Step 3: Add Balloons to the Base
Once you’ve created your base, it’s time to start adding balloons to it. Start by attaching your larger balloons to the base, spacing them out evenly. Then, add your smaller balloons in between the larger ones to fill in any gaps.
Step 4: Customize Your Garland
Once you’ve added all of your balloons, you can customize your garland by adding different textures and shapes. For example, you can add some foil balloons for a shiny look or some flower-shaped balloons for a whimsical touch. You can also add some greenery or other decorations to make your garland even more festive.
Step 5: Hang Your Garland
When you’re happy with how your garland looks, it’s time to hang it up. You can use command hooks to attach it to the wall or ceiling, or you can tie it to a backdrop or arch. Be sure to use a sturdy anchor point so that your garland stays in place.
Step 6: Enjoy Your Balloon Garland!
Once your garland is up, take a step back and admire your work! Your balloon garland is sure to add some festive cheer to any occasion.
Tips and Tricks
Here are some additional tips and tricks to keep in mind when making your balloon garland:
- Use a variety of colors and sizes to add interest to your garland.
- Don’t be afraid to mix and match different textures and shapes of balloons.
- If you’re having trouble getting your balloons to stay in place, use a glue dot or some double-sided tape to secure them.
- Make sure you have enough space to create your garland – it can take up more room than you think!
- If you’re short on time, consider using a balloon garland kit that provides everything you need to create a beautiful garland.
Making a balloon garland at home is a fun and creative way to add some flair to your party decor. With the right tools and some simple steps, you can easily create a stunning garland that will impress your guests. Remember to use a variety of colors, sizes, and shapes
to make your garland interesting and customized to your event. And don’t forget to securely hang it up so you can enjoy your creation without any worries.
- Renovate or Rebuild? What to Consider If Your Melbourne Home Needs Major Structural WorkIf your Melbourne home requires extensive structural work, you may be wondering whether it’s better to restore what’s already there or begin again with a brand-new home. Navigating the renovate vs rebuild Melbourne decision can seem complex at first, but taking the time to understand... The post Renovate or Rebuild? What to Consider If Your […]