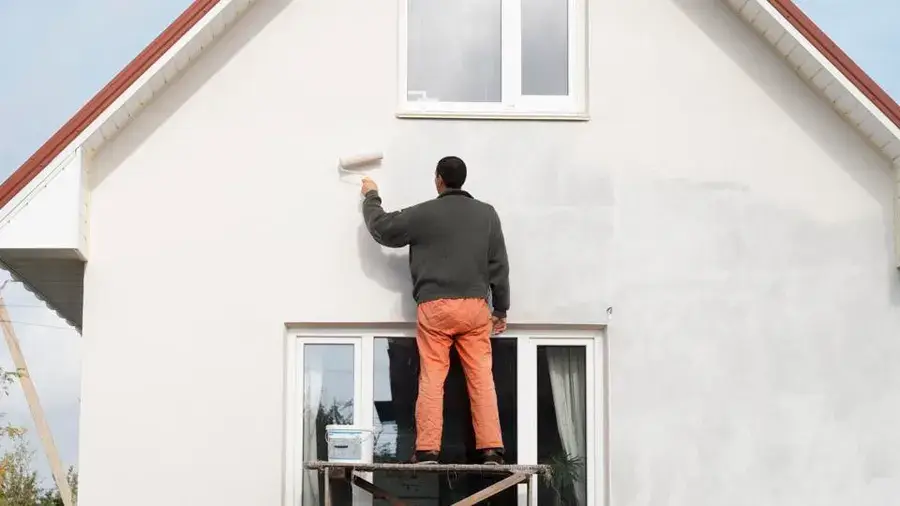
When it comes to house painting, many homeowners opt to take on the project themselves. While hiring professionals can guarantee a better result, there’s something cost-effective about a do-it-yourself approach. Using the proper techniques, you can achieve a paint job that gives your home a professional and inviting look. Let’s guide you through the steps for completing your house painting project.
1. Planning and Preparation
Before you begin painting, it’s crucial to plan and prepare accordingly. Start by examining the surfaces that must be painted and identify any repairs. Fill in cracks or holes using a filler and smooth out any uneven areas with sandpaper. To ensure paint adhesion, clean the surfaces using a detergent and sponge to remove dirt, grime and grease. You can always hire exterior painters in West Auckland for a flawless experience.
Protect your furniture, floors and fixtures by covering them with drop cloths or plastic sheeting. Remove switch plates, outlet covers, or any other hardware that could obstruct your work or get splattered with paint. Lastly, it’s essential to make sure there is air in the room by opening windows or using fans to avoid the accumulation of fumes.
2. Choose the Right Paint and Tools
Exterior painters in West Auckland always suggest that selecting the right paint and tools is crucial for achieving a good outcome. Opt for high-quality paints that provide coverage and durability. Consider the type of surface you’re painting and choose a paint, such as latex, oil-based or specialty paint specifically designed for materials like wood or metal.
Regarding brushes and rollers, it’s worth investing in good-quality ones to ensure an even paint application. Different brushes and rollers are designed for different surfaces, so ensure you select the right ones for your project. A high-quality brush will hold paint, apply it evenly and reduce brush marks. Likewise, using the right roller size and nap thickness can significantly contribute to achieving a flawless finish.
3. Apply Primer on the Surface
Applying primer before painting is a step that shouldn’t be overlooked. Primers enhance paint adhesion, resulting in a more uniform finish. They also help block stains, seal surfaces and improve coverage.
Once the primer has completely dried, it’s time to start painting. Begin using a brush to paint along the edges where the walls meet the ceiling, corners, trim and windows. This technique ensures a precise result while preventing any splatters on nearby surfaces.
After completing the edges, switch to a roller to paint the middle areas. Start from the top and work your way down using even strokes for a consistent coat of paint. Avoid applying pressure on the roller to prevent an uneven finish or streaks. Remember to maintain an edge by overlapping each stroke with the one while the paint is still wet.
4. Apply Multiple Layers and Finishing Touches
Achieving a good-looking finish requires multiple coats of paint. Make sure each coat is fully dry according to the instructions provided by the manufacturer before proceeding with another layer. This will ensure better coverage, depth of colour and a more uniform appearance. Applying two to three coats should be sufficient. You may need more coats depending on factors such as the colour you’re covering or your desired outcome.
Once the main painting is complete, adding those finishing touches is time. Take a look at the painted surfaces to check for any drips or spots that may have been missed. Use a brush or roller to fix and touch up these spots as necessary. It’s essential to be patient during this step, as taking the time to address imperfections will significantly improve the outcome.
5. Tidying Up and Proper Disposal
Proper cleanup is crucial for maintaining the longevity of your painting tools. Clean your brushes with soap and water if you worked with latex-based paints or use paint thinner for oil-based paints. Store them in their packaging and hang them up properly to ensure they remain in good condition for future use. When disposing of any leftover paint and materials, make sure you comply with regulations to minimise any environmental impact.
Conclusion
By following these steps, homeowners can achieve an excellent finish when painting their houses. By planning and preparing adequately, selecting the right paints and tools, priming the surface, applying multiple coats of paint, paying attention to those finishing touches and cleaning up properly afterwards – with a little patience, attention to detail and high-quality materials – you’ll be able to transform your home and enjoy the satisfaction of a job well done!
- Cost of Living Trends in Dallas for 2026Dallas has a reputation for being affordable compared to coastal cities, and for a long time that reputation held up pretty well. But 2026 looks a bit different. Prices across the board have shifted, some in ways people expected and some that caught newer residents... The post Cost of Living Trends in Dallas for 2026 […]